Simon Shengyu Meng
中文
About
History
Categories
Tags
Archive
Friendship links
ecoLogicStudio
AI bot
Homepage
Search
文章
43
分类
2
标签
14
中文
About
History
Categories
Tags
Archive
Friendship links
ecoLogicStudio
AI bot
Homepage
Search
ComfyUI Desktop User Guide
发布于:
最后更新: May 12, 2025
次查看
目录
0%
Set-up Instructions
1. Download
2. Choose an install directory
3. Folder Access
4. Templates & Auto Model Download
5. Manager & Custom nodes
6. Logs & Terminal
7. Install Pip packages
8. Settings
9. Update Version
10. Missing Models
New to ComfyUI - Core Concepts
1. What is ComfyUI?
2. What is a Workflow / Node?
3. Try Your First Generation
4. Leverage the Power of Workflows and Custom Nodes
Latest Models supported in ComfyUI
Feedback
Troubleshooting
1. Log Files
2. Config Files
3. Uninstall
Simon Shengyu Meng
AI artist driven by curiosity, cross-disciplinary researcher, PhD candidate, science communication blogger.
文章
43
分类
2
标签
14
最新发布
Worldline Overload {Choose to Patch |or| Forced Reboot}
Aug 22, 2025
AI Programming Tools: An Introduction and Comparison
Aug 22, 2025
Vibe Coding: Fundamental Concepts
Aug 22, 2025
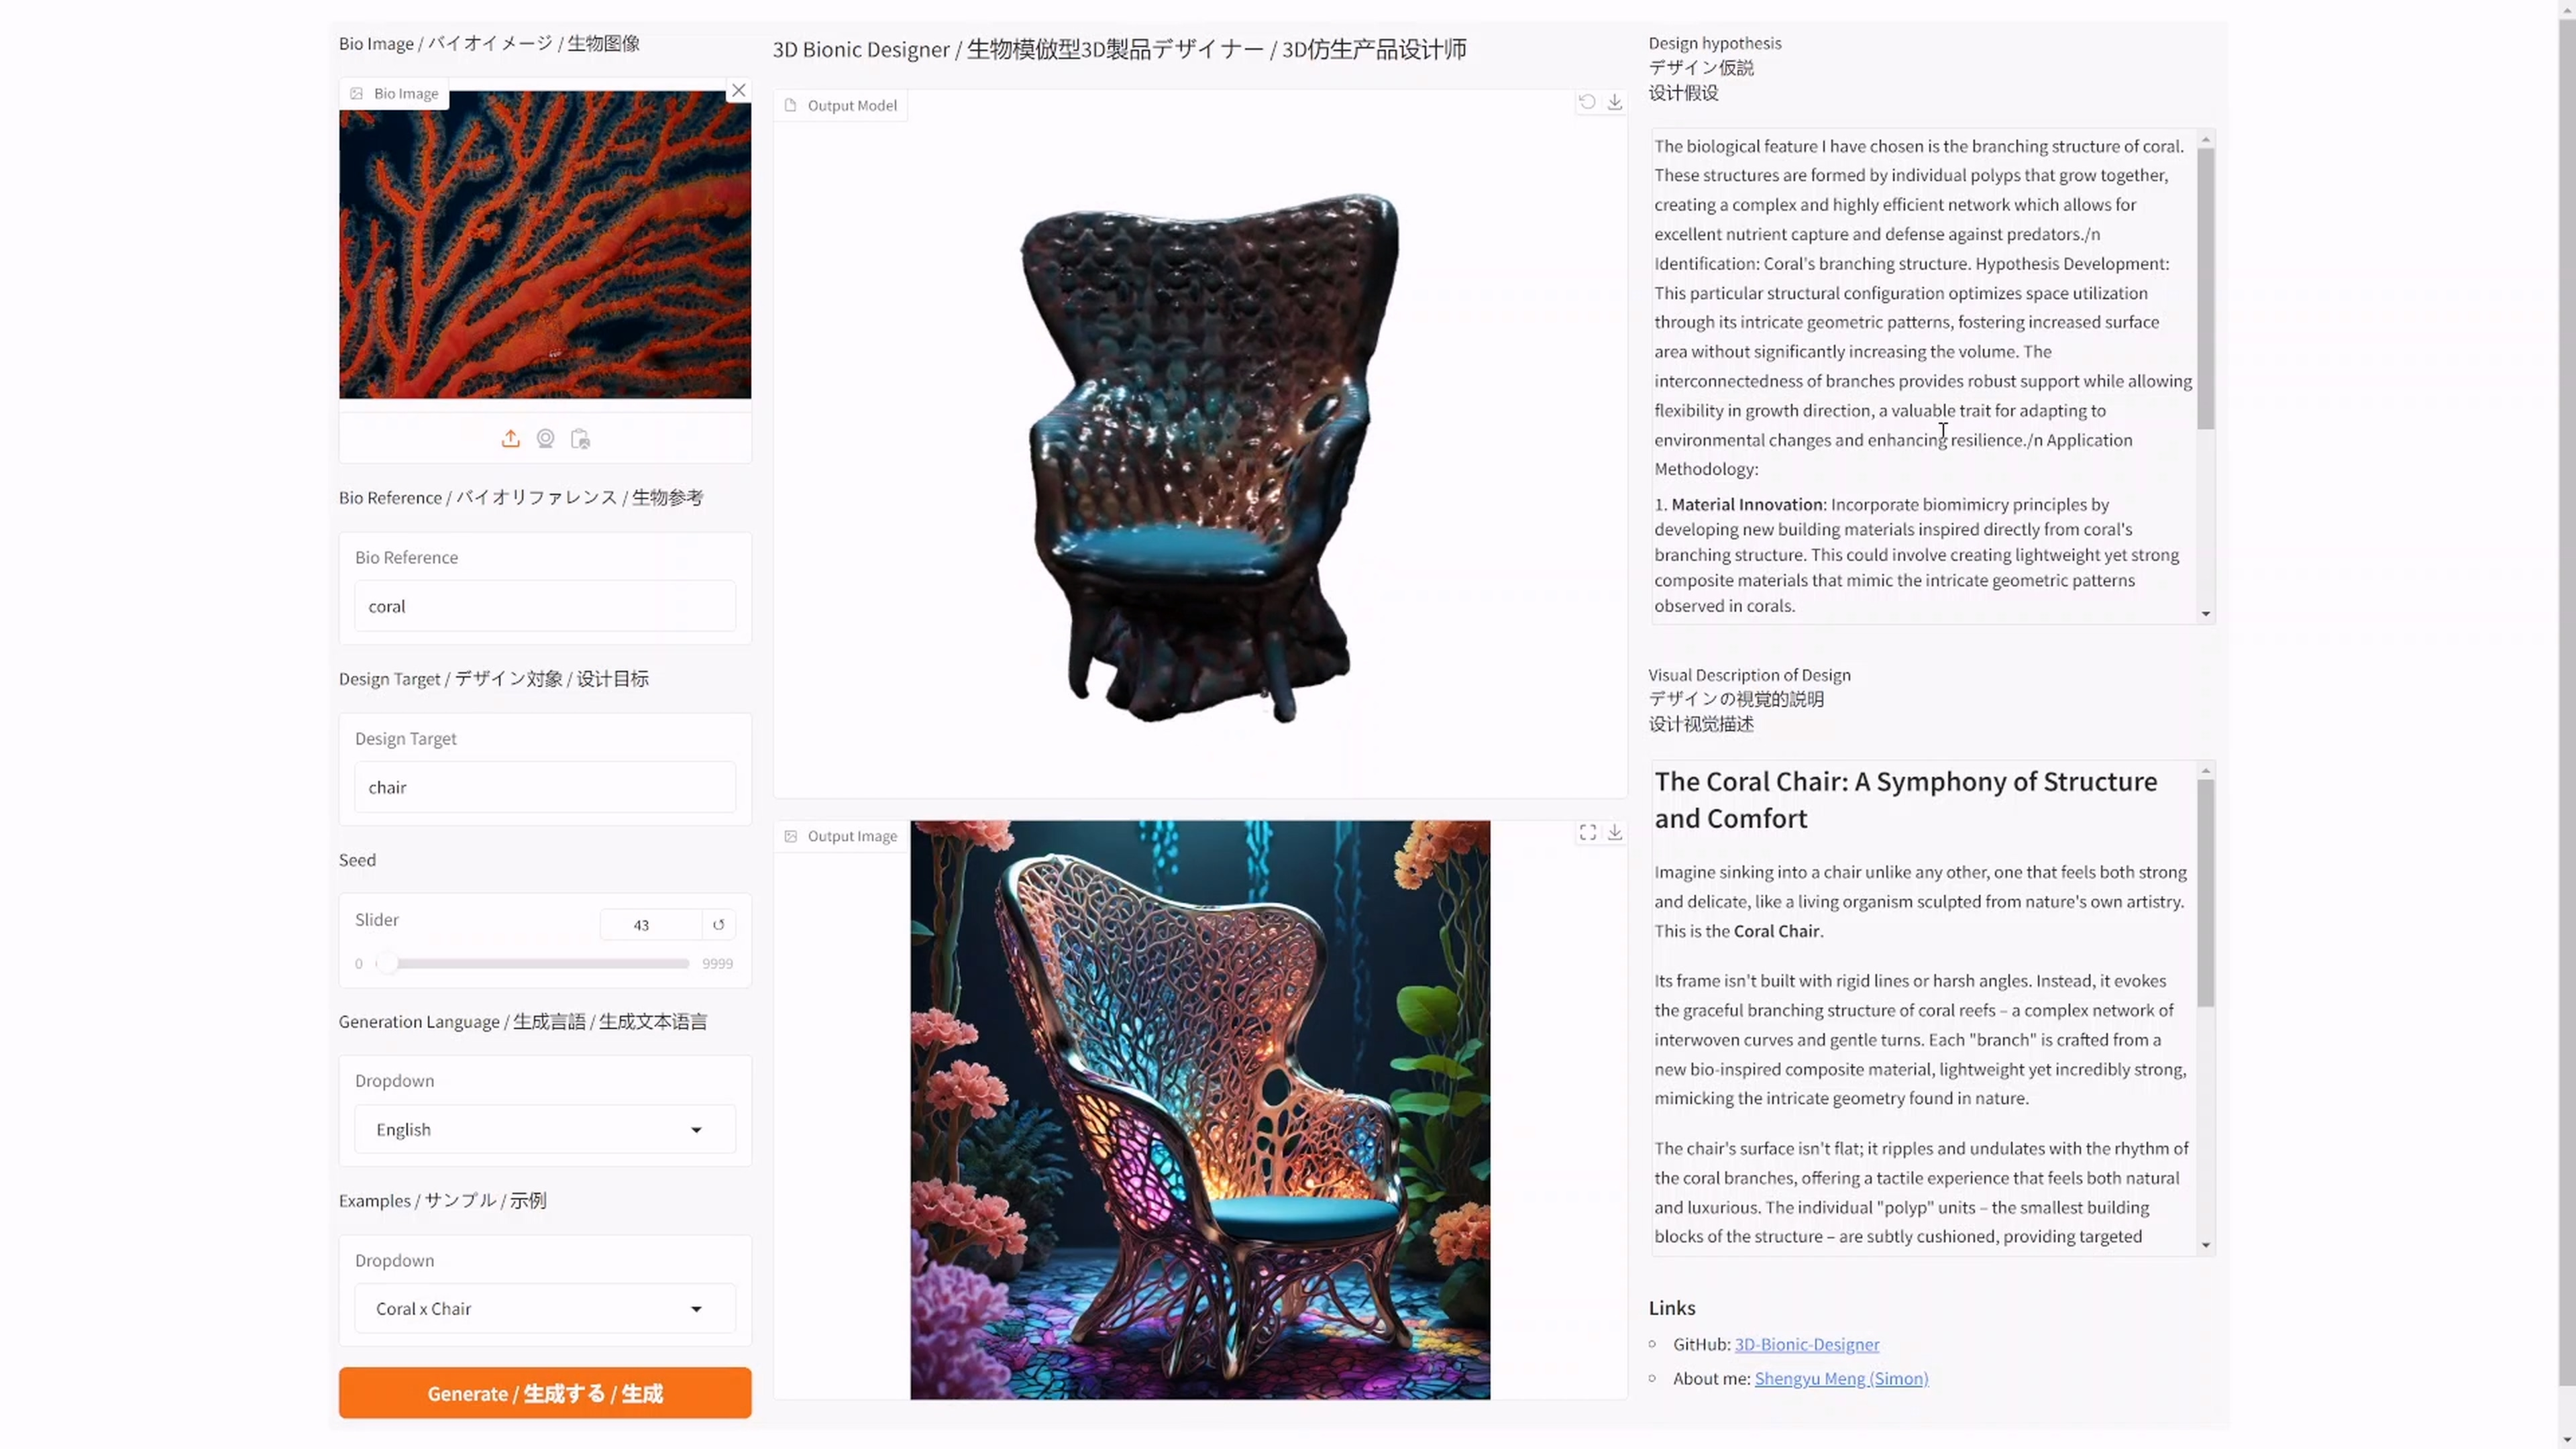
I have open-sourced an AI bionic product generator: 3D Bionic Designer
Aug 22, 2025
Works Series - MicroCosmos
May 23, 2025
Works Series - RE-Imaginate nature
May 20, 2025
公告
---
About me
---
--- Contact Me ---
Twitter (X)
Instagram
|
Github
Email
|
Wechat
Design and Art Creation | AIGC Consultation and Training | Commercial Deployment
目录
0%
Set-up Instructions
1. Download
2. Choose an install directory
3. Folder Access
4. Templates & Auto Model Download
5. Manager & Custom nodes
6. Logs & Terminal
7. Install Pip packages
8. Settings
9. Update Version
10. Missing Models
New to ComfyUI - Core Concepts
1. What is ComfyUI?
2. What is a Workflow / Node?
3. Try Your First Generation
4. Leverage the Power of Workflows and Custom Nodes
Latest Models supported in ComfyUI
Feedback
Troubleshooting
1. Log Files
2. Config Files
3. Uninstall