Simon Shengyu Meng
中文
About
History
Categories
Tags
Archive
Friendship links
ecoLogicStudio
AI bot
Homepage
Search
文章
43
分类
2
标签
14
中文
About
History
Categories
Tags
Archive
Friendship links
ecoLogicStudio
AI bot
Homepage
Search
Knowledge
L1-Customized model install in ComfyUI.
最后更新: Jan 22, 2025
次查看
Tutorial
Teaching
目录
0%
📝 Auto install via ComfyUI manager.
📝 Manually install by download file and put in ComfyUI working folder.
Step One: Download the Stable Diffusion Model
Step Two: Install the Corresponding Model in ComfyUI
Step Three: Verify Successful Installation
🔎 Useful resource
Simon Shengyu Meng
AI artist driven by curiosity, cross-disciplinary researcher, PhD candidate, science communication blogger.
文章
43
分类
2
标签
14
最新发布
Worldline Overload {Choose to Patch |or| Forced Reboot}
Aug 22, 2025
AI Programming Tools: An Introduction and Comparison
Aug 22, 2025
Vibe Coding: Fundamental Concepts
Aug 22, 2025
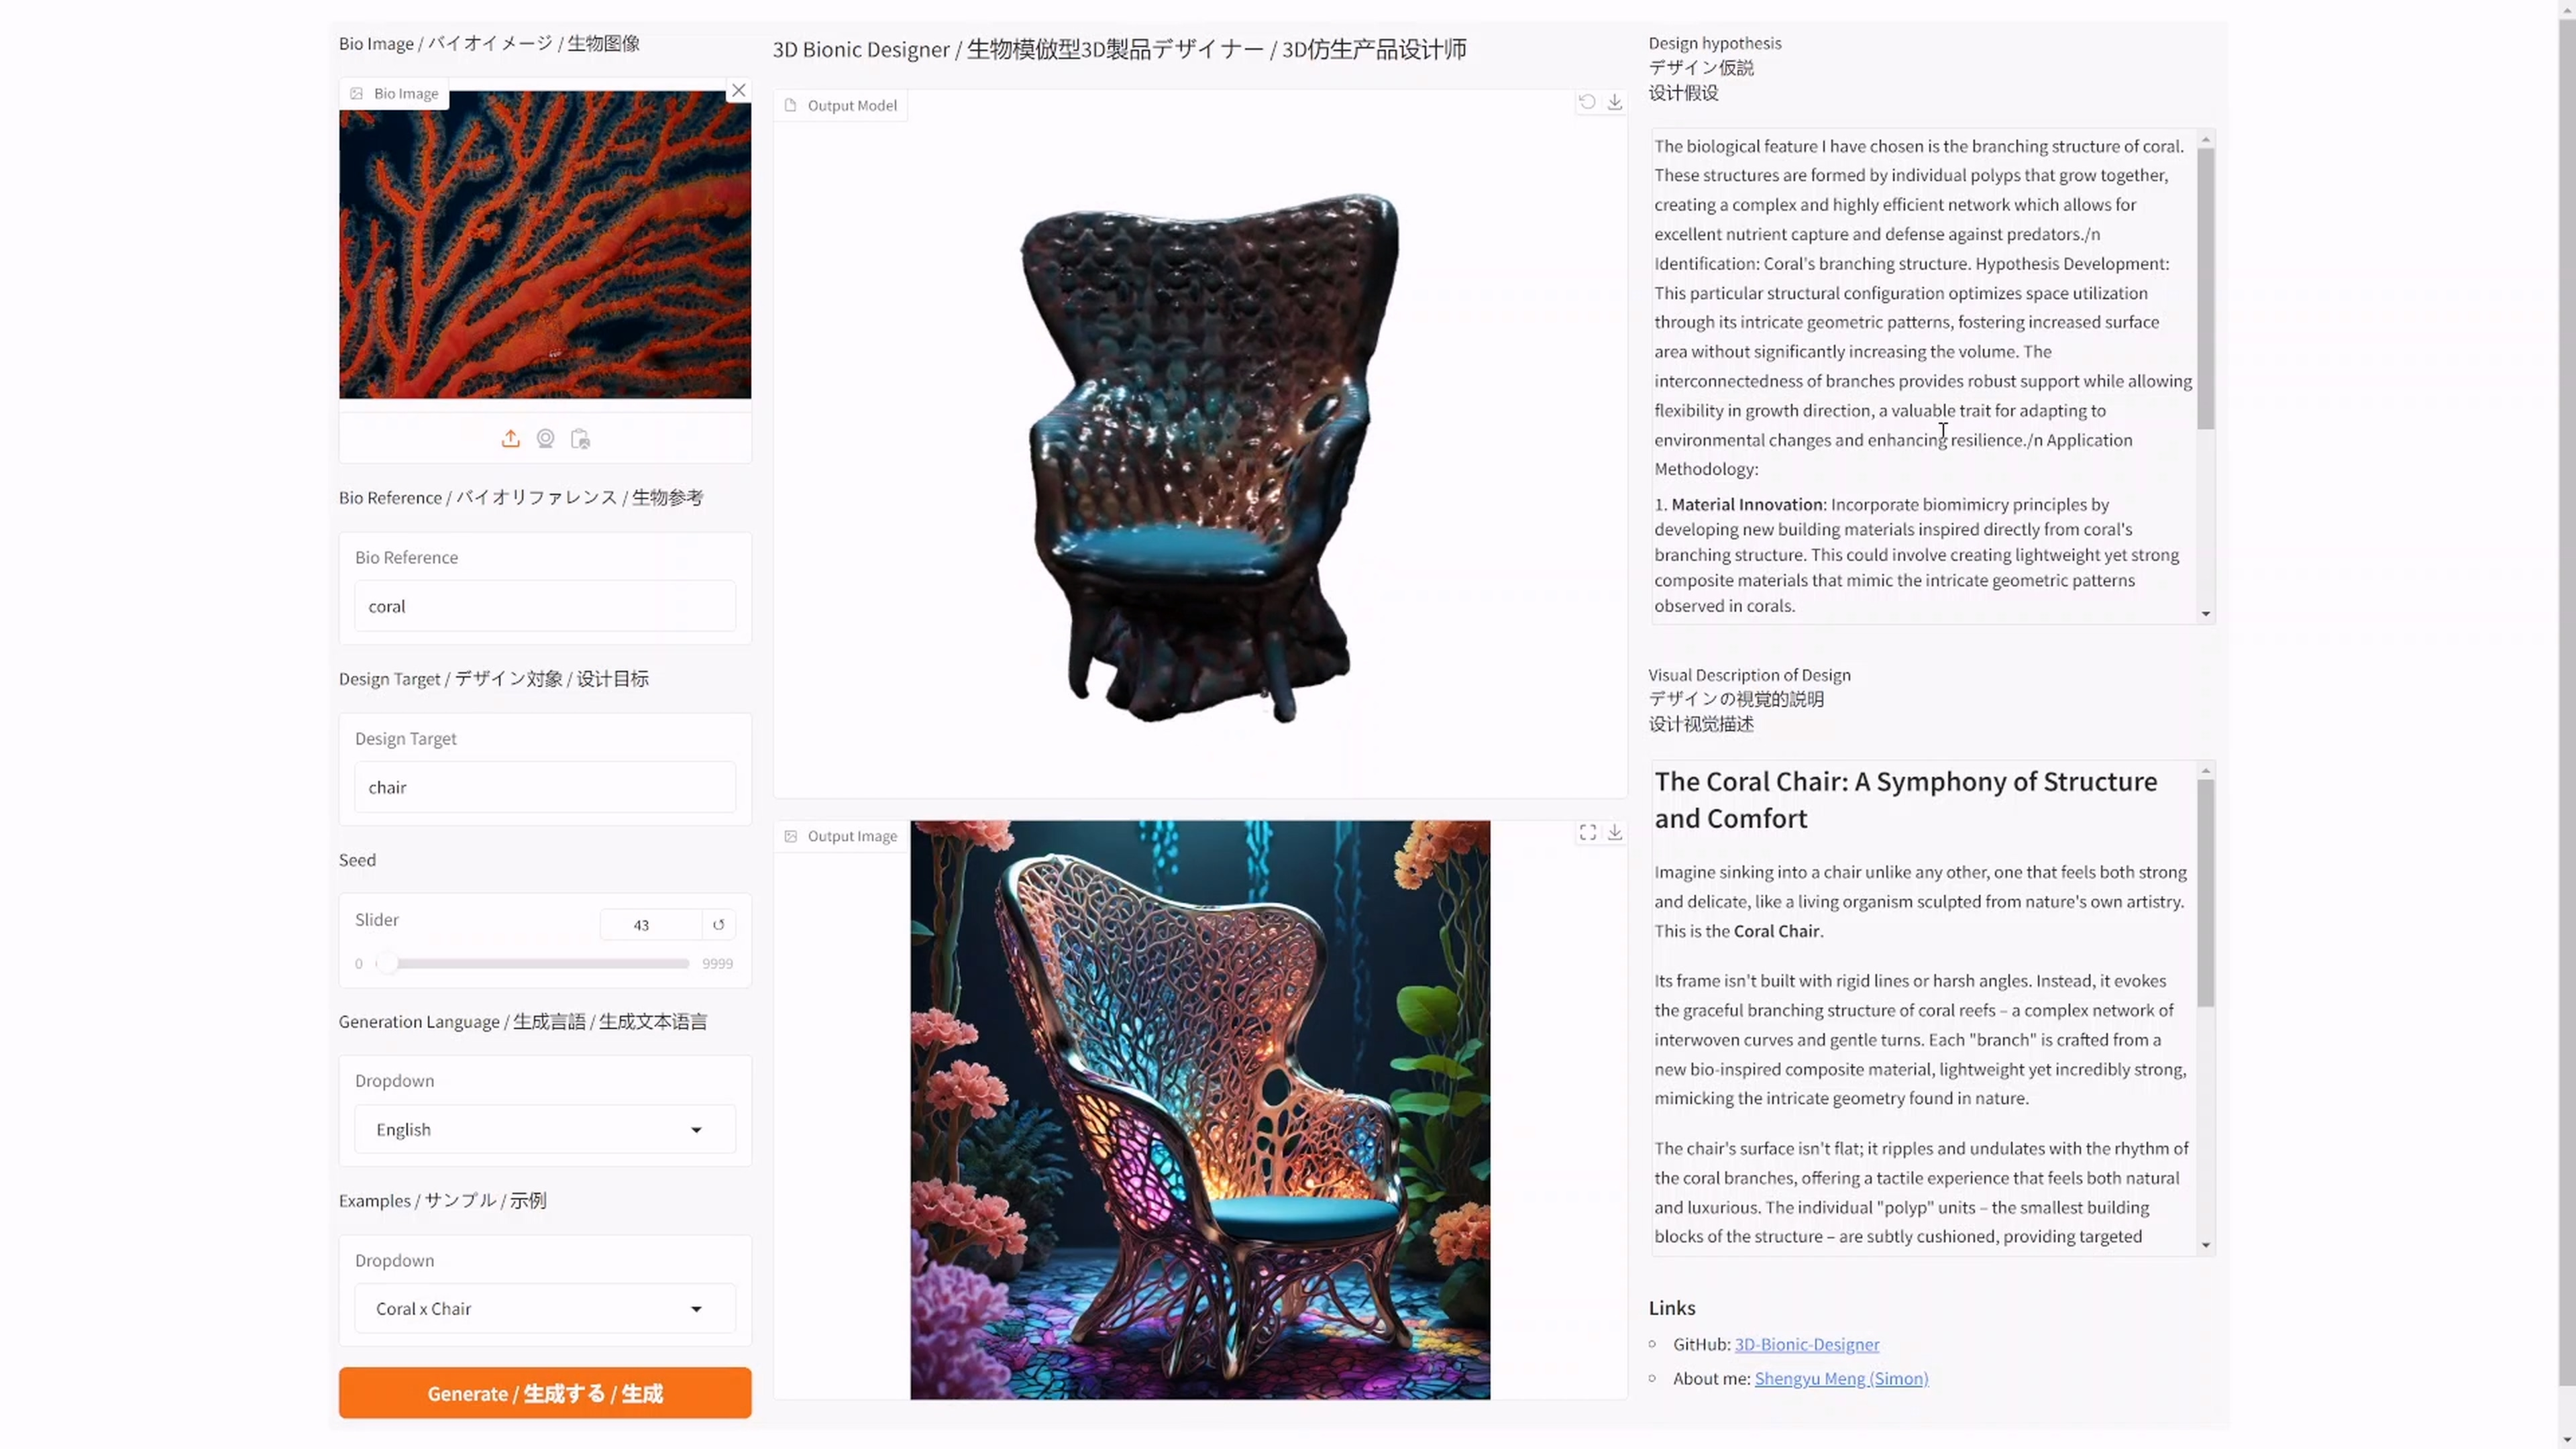
I have open-sourced an AI bionic product generator: 3D Bionic Designer
Aug 22, 2025
Works Series - MicroCosmos
May 23, 2025
Works Series - RE-Imaginate nature
May 20, 2025
公告
---
About me
---
--- Contact Me ---
Twitter (X)
Instagram
|
Github
Email
|
Wechat
Design and Art Creation | AIGC Consultation and Training | Commercial Deployment
目录
0%
📝 Auto install via ComfyUI manager.
📝 Manually install by download file and put in ComfyUI working folder.
Step One: Download the Stable Diffusion Model
Step Two: Install the Corresponding Model in ComfyUI
Step Three: Verify Successful Installation
🔎 Useful resource